Snake Plant Care tips


Snake Plants is a great houseplant for beginning gardeners.  It is a very carefree type of plant that likes dry soil and air, which makes it perfect for many indoor environments.

This plant has a variegated leaf that can reach two feet in height.  Some varieties can have leaves that are edged white or yellow.  One variety also produces a low growing leaf that only grows a few inches.

Growth Requirements
  • This plant is a slow grower and infrequently needs to be transplanted.  If you want to share the plant, it can be divided or started from a leaf cutting.  Regardless of which propagation technique you choose, the soil medium needs to be a soilless or cactus medium.
  • Snake Plant is very tolerant of temperature fluctuations.  The ideal temperature range is 60-75 degrees F but it can tolerate other temperatures as long as it is not freezing.
  • The sunlight requirement of this plant is just as tolerant.  It does very well in bright sunlight to partial shade but it can survive in shady conditions.

Propagation Techniques

If you want to share your plant or need additional starts of this plant, there are two propagation techniques to follow. The first type and the easiest is through plant division.  To begin this process, one needs to gather all their supplies.  This includes a sharp knife, container, drainage material, soilless or cactus mix and plant.
  • The first step of this process is to remove the plant from its container.  This is easily done by tipping the plant upside down into your hand and gently tapping on the container.  If the plant will not come out, gently squeeze the sides of the container to loosen the root ball.  Next, lay the plant onto a hard surface and examine the root mass.  Depending on how many starts you want will determine how may cuts you need to make.  Regardless of the number, the process is the same and entails running a knife through the root mass and dividing it.
  • Once the plant has been divided, place drainage material in the bottom of the container, add planting medium and place divided plant material into the container.  Fill in the pot as needed until the pot is filled within ½ inch from the rim.
  • The second type is leaf cutting.  To begin this process only requires minimum supplies and includes the plant, a knife, container and rooting medium.  The process is simple and starts by taking a 3 to 4-inch piece of the leaf and sticking it into the rooting medium so that ¾ of the leaf is in the medium.  Once this is done, keep the rooting medium evenly moist and in a few weeks roots will begin to appear on the bottom of the leaf.

Problems

While this plant is easy to grow, there are some problems. 
  • First, this plant does not like to be in soggy soil.  Many gardeners misinterpreted the sagging leaves of this plant as a signal that the plant needs water.  The opposite is true.  Saggy leaves are an indicator that the planting medium is too wet so before watering always check two inches down.
  • The second problem that exists is the structure of the leaf.  The point on top of the leaf can be dangerous and can even go through an eye.  To remove this danger, clip off the tops whenever they appear.
  • The third problem is that this plant is susceptible to thrips and scale.

Air Plants

How to Grow Air Plants


  • Constant air circulation -- as the name indicates -- is paramount to keeping your plant happy.
  • Air plants need some moisture; from late spring to mid-autumn, mist daily. In winter, mist only once or twice a week.
  • Fertilize monthly in spring and summer using a low-nitrogen liquid fertilizer mixed at only one-quarter strength. In general, fertilize weakly.
  • Although they love warm weather, most air plants need protection from full sun. If it's a type that grows naturally wild on trees, keep it in moist, partial shade. If it is a ground type, such as T. cyanea or T. lindenii, grow it indoors in bright, filtered light and outdoors in partial or dappled shade.
  • Don't let an air plant sit somewhere that's colder than 45 degrees; it will die at those temperatures. If you live in Zone 9 or warmer, you can grow an air plant outdoors all year if you keep it dry during the winter.

How to Use Air Plants


Even though they are easy to care for, there are a few rules to follow when growing air plants:
Air plants look great alone as architectural elements or in an air plants terrarium. Place varieties such as Tillandsia aeranthos 'Amethyst', also called the rosy air plant, into a pot or against a container that will complement or contrast with its pink flower spike.
Play off the spikiness of the foliage by grouping threeTillandsia ionantha and add a tiny toucan, parasol, or other tropical touch.
Air plants that are naturally suited to growing in trees can be lashed against a protected wooden post using translucent fishing monofilament and a bit of sphagnum moss to add extra moisture. Tillandsia species also make fine companions on a planted branch with orchids since they like essentially the same conditions. Hanging air plants are a popular design element.

Another way to add green in your bathroom

Bathroom Moss Carpet

There’s nothing like the feeling of fresh cut grass under the toes, especially when stepping out of the shower. This Moss Carpet brings the outside indoors in an unconventionally natural way by placing it underfoot. The lush green lawn thrives in humid environments, which makes your bathroom a perfect place to grow.
bathmat 3
How to make:

Requirements:
Foam Roll
ScissorsX-acto Knife Stencil
Hot Glue Gun
Assorted Moss Plugs
Now that we’ve got that down, what’s next?
Foam is available online in rolls 24-by-12 inches, but is also used in floor mat sections available in home improvement stores. This plastic foam material is ideal for wet-dry use. You will need two layers of mat material, pick your favorite colour! (Or even use Multi-Colours, if it tickles your fancy).
bathmat 6
Stack two layers of mat material on a hard surface and draw an organic shape with chalk or white marker. The textured side should be down.
bathmat 4
Cut through both thicknesses along the marked lines with an X-acto knife. Set aside one layer of material. Draw and cut out shapes throughout the center of the second layer. This material is hard to cut. Take your time and make multiple cuts or try using an electric bread knife or rotary tool.
bathmat 2
Spread a layer of silicone on the back of the mat with the cut out shapes. (Some silicone comes out white but dries clear.) Press the two pieces together, carefully aligning the edges. This creates a single mat of about 1 inch thick with perfect spaces for filling in with moss.
When the silicone is dry, usually after about 3 hours, spray the mat with a fine mist of water. Let this soak in and spray another mist.

Fill each hole in the top layer of the mat with your own selection of moss plugs, which can be purchased online or from specialty nurseries and gardening stores. Irish moss, Spanish moss and some forms of hardy ground-covers work well. Plant a variety of moss for color interest.


Place the mat near your tub or shower as you would any other shower mat. Simply shower and step out on it. The soft, plush moss will absorb the water dripping from your body as you towel off on it. This, in turn, provides the moss with moisture to thrive. In some cases you might have to add moisture by spraying with water occasionally.

bathmat 5
bathmat 9
bathmat 1
green-moss-carpet-rug

Benefits of Vertical Gardening


Vertically gardening is  gaining lot of interest by urban gardening fans. The popularity is due to the fact that they allow home owners and renters to grow plants in small area. A vertical garden will work just fine on a small strip of soil in front of your house or even  on a balcony. Vertical garden bring lots of benefits with itself. 
  • Vertical  Garden works very hard for you by becoming a shield to your home, they protect your home from harsh whether and UV rays. During rains green wall can help from paint damage. 
  • These vertical plantings also act as a insulation, increasing the energy efficiency. It reduce the house temperature to 10 degree compared to the outside temperature. 
  • If you place them on the outer side of window, they will act as a shade from harsh sun and passerby. Plus it creates a lovely view in your crowded cemented urban neighborhood.
  • Vertical garden can be trained to grow up on an existing fence or supported on purpose built frames. these frames will not only offer you privacy, appeal but also reduce noise pollution.
  • You can use green hanging to hide the unwanted and damage areas of your property
  • Indoors vertical garden can act as an attractive room divider. 
  • Adding indoor vertical garden will serve your home to improve the air quality. 
  • Living frames can add a soothing effect at your working space, giving natural beauty and mental peace.
  • Vertical gardens are good for pets, where you can have you personal organic garden without pesticides.


How to Grow and care an Orchids


Orchids are beautiful lovely indoor plants. They look bit complicated to grow and nursing them is another task, but I believe it's not. So, let check that out.

Vandas 

1. One of the most important factors when it comes to growing orchids is the amount of sunlight they receive.  The requirement is based on the type of orchid you have.  Vandas and Angraecams require the most intense light that needs to be unobstructed.  To maximize the amount of sunlight, place these orchids on a south-facing windowsill and make sure there are no tree or building obstructions.

2. Phragmipediums, Oncidiums and Dendrobiums like a medium-high light but not direct.  This type of light can be found on a west or east facing window.

3. On the other hand, only the Phalaenopsis likes a medium to low light that can be found pouring through a east or west window.  The Jewel orchid is the only orchid that tolerates low light, which can be found on a northern-facing window.

4. The next requirement for orchids is temperature but just like the light requirement each type of orchid has its own temperature requirement.  The best bet is to decide where you would like to place an orchid and measure the temperature.  Once you have that information, then you can make a discussion on the orchid type.

Phragmipediums
5. Humidity is another limiting factor when it comes to orchids and in doing so the typical home is not the best place for high humidity.  To mimic the tropics, place your orchid on a humidity tray.  This tray is created by filling it up with pebbles and then with water.  Place the orchids on the tray.  Another approach to use is to just group your plants together.  The simple process of transpiration will create the humidity.

6. Watering can is a challenge to the beginning orchid grower.  The reason for this comes from the fact that orchids are not planted in traditional soil.  Instead, they are placed in bark or moss.  To give this type of medium a chance to absorb the water, you need to submerge it.  Before you grab your plant and put it in a bowl of water, you will need to know what type of pot it is planted in.

For orchids that are planted in plastic, place the pot in a bowl of water and allow it to sit for 10 to 15 minutes.  After that time has passed, pick the pot up and allow it to drain before placing it in a decorative container.

On the other hand if the plant is in terra cotta, place the pot in a bowl and then fill with water until the water level reaches the rim of the pot.  Allow to sit in the water for 10 to 15 minutes and then remove to drain.
Dendrobiums

How often you water depends on a lot of factors.  The more light the plant receives the more often you will need to water.  Also, if you do not have your plants on a humidity tray, you will need to water more often.  The type of orchid you have will also affect how often you water.

The type of planting medium and its container are also factors when it comes to watering.  Bark and clay pots require more frequent watering while sphagnum moss and plastic containers requires less.

Orchids normally do not require fertilization but if you insist on feeding your plants, feed them a half strength fertilizer every other time you water and only do this during the growing season.  To prevent salt buildup in the pot and planting medium, make sure to water with clear water at least once a month.

Phalaenopsis
While the requirements of an orchid have been covered, there is always the question as to how to force an orchid to bloom or bloom again.  Orchids have a 3 month bloom cycle.  What this means is that if the conditions are correct, the plant will bloom.  If your plant is blooming right now, you can encourage it to bloom again right away by simply pruning back the flower stalk before the entire flower dies.  This will encourage the plant to produce a secondary flower stalk that will give you another month or so of bloom.

Part of learning how to grow and care for an orchid not only comes from learning the growing requirements and how to provide them but also how to transplant the orchid.  This process should begin when the weather has warmed, the plant has stopped blooming, the planting medium has broken down and/or the roots are coming out of the pot.  Or, you can just plan on transplant your orchid every 3 years.


Since this planting process can make a mess, plan on doing the planting process outside.  The night before you plan on transplanting your orchid, water the plant.  This will make separating the roots from the planting medium easier to do.  Also, soak the planting medium in water overnight.  This planting medium can be pine bark, sphagnum moss or soil.  The type of planting medium that you use will depend on the type of orchid you are transplanting.  If you are not sure what to use check out what is in the pot right now.

Oncidium
While the soil and orchid are soaking, prepare the pot.  Make sure that the pot has a drainage hole.  This will prevent one from drowning the plant.  Next, wash and sterilize the container by washing it in warm water and capful of bleach.  Once the pot has been cleaned, rinse it in clear water and place in the sun to dry.   Next, place a layer of pebbles in the bottom of the pot.  Once that is done, remove the orchid from its old container and remove the spent planting medium.  Also, trim any dead or damaged roots and then place in the prepared pot.  When placing the orchid in the container, make sure that the roots are placed 1-inch below the rim.  Fill the pot with your chosen planting medium and gently tap on the table to settle.  Add additional planting medium as needed to secure the plant into the pot.  At this point, push a stake into the planting medium.  This will give you a surface by which to tie up the flower stalk.

Now move your orchid to its permanent location but make sure that this location addresses its individual light requirement.  To address the humidity requirement, make sure that you have plants grouped together or the orchid placed on a humidity tray.  When using a humidity tray, place the plant on top of the tray not inside the tray.  This will prevent any wicking, which will keep the planting medium too wet

Rubber Plant

If you organize a plant fashion show then i believe that Rubber plant can sure be a show stopper. If you are wondering why I have chosen Rubber plant, then the answer to it is the large, waxy, emerald green leaves. Also its beauty is not limited to its outer appearances but to its easy care also. 

Rubber plants are easy gong plants and have very few requirements.

1. Its very easy to grow a rubber tree from a small sampling.
2. The light requirement can also be easily fulfilled by placing near a bright lighting window. 
3. The best way to water is to place the plant on a saucer filled with stones and water it once in a while according to the moistness in soil. Rubber plant will droop its leaves if the soil is dry, and they will turn yellow to brown when too wet and the last stage is they will fall. If any of these situations occurs, adjust your watering pattern.

To encourage leaf development, when a leaf fall make a simple cut in the node where the leaf used to be. Rubber trees can easily be pruned to control growth. When pruning or taking cuttings always make the cut at an angle.  Then, place the cutting directly into a good potting medium or place in a glass of water to root.

Another way of starting new rubber trees is through a propagation process called air layering.  This process is a little more involved but it is worth the effort.  To begin this process, one first selects a healthy branch and then pushes a toothpick through the stem where you would like to cut it back at.  Pack this area with premoistend Sphagnum moss and then cover with plastic wrap.  Once roots appear through the wrap, cut the stem off at the plastic wrap, remove the plastic wrap and plant.

African Violets Care

Do you know that African Violets are one of those rare indoor plants, those grew around the year. In fact they are the some of the easiest indoor plants to grow, once you know some of their simple requirements and necessities. 

African Violets love natural filtered light and not direct sunlight, so there are few keys element to always remember and there will no reason you can't have a house filled with colorful, velvety African violets. 

Now, have you ever struggled to maintain them, just follow these steps and you are done. 

1. Placing of African violets:  Placing in the right direction is the soul for them to live. Always avoid hot or direct sunlight, it will scorch the plant and burn the leaves. There natural habitat is under forest canopies. So, the indirect sunlight or good filtered light are the best to flower your plant year around. 
Do you know that African violets do well in artificial lights also, like in your office. Thus they are flexible plants. 

2. Favorite temperature for African violets: African violets are little sensitive plants and prefer to be on there comfort zone. So, any large variation in the temperature around them can effect there blooming. the best range of suited whether for them is (18 degree C to 24 degree C) during day and (15 degree C to 18 degree C) during night.

3. If you like then use African violets pots: There are special pots for African violet, they come in two different pieces. If you want to use these pots, pot the plant directly in the top portion of the pot. These pots come with the instruction to keep the lower portion of the pot filled with water. So, the trick is not to do that until and unless the soil is dry, pour water into the lower portion put the top pot in for about an hour or until the plant is nicely moist, then pour out any unused water. 

If you do not want to buy these special pot, the same way can be adopted with the normal pot also. 

4. Water them: I just said water them not over water them. the easiest way to kill them is by over watering them. the best way to water you plant is not directly, keep a saucer underneath your pot. When you feel the soil has started to dry out simply fill the saucer.

Also do not mist the foliage, water spots on the foliage may cause permanent leaf spotting. 

5. Nourish them with fertilizer: African violets will flower more often when you fertilize them regularly. Another things these plants do not like cold water nor chlorine. 

6. Repot then in every six months to one year: The soil you use must have excellent drainage. This is critical. You can buy pre-packaged African violet soil mixes or mix your own using 1/3 peat moss, 1/3 vermiculite and 1/3 perlite. Secondly, use the right sized pot because all Saintpaulia must be potbound to flower, so choose a pot that is 1/3 the diameter of the plant. 
In other words, the plant should be 3 times the diameter of the pot it is in before potting up. An African violet's root system is only about 1/3 of the diameter of your plant. A four inch (10 cm) pot is usually adequate, but measure to make sure. Choosing the proper sized container also helps prevent root rot because if you use too large and deep a pot, it will lead to excess moisture in the soil and the roots will die.


Note: If one of your African violets has developed a neck, which is that bare place where the leaves have been taken off, make sure to repot your plant as soon as possible, and make sure the neck is covered with soil when it has been replanted. It will grow new roots along the newly buried neck area.
One last note - African violet plants are pet friendly and they are not toxic to animals, so you can have as many as you want throughout your home!.


Tutorial - Vertical Pocket garden


You you will need:
1. Felt
2.Plastic Sheet
3. Industrial thread (water resistant)
4. Plant
5. Potting Soil
6. Scissors

Procedure:

1. Fold felt over, leaving about a half an inch of available space at the top. Pin the Plastic Sheet inside and using an industrial-style thread, sew along the two sides.

2. After sewing, place the grommet base and tool on the right side of felt where you wish to create the holes. Pound down in one fell swoop (be careful!) and puncture felt with tools. Repeat on left side. 

3. Place grommets in the newly made holes. 


4. Take the hammer, grommet base, and grommet back and place felt in between — hammer together so that the grommet is now securely in the felt. 
5.  Place potting soil in the pocket. 

6.Remove plants from pots and secure in the pocket, making sure the plants are turned forward. 

World tallest vertical garden building


Clearpoint Residencies, based in Kotte just outside Colombo, will be the first sustainable high-rise apartment complex in the country, with solar panels for electricity generation, a waste water recycling system and planted facades. Building began last year and is expected to be complete by 2016, at which time it is claimed that the building will be, "the tallest residential vertical garden in the world, with planted terraces circling the entire structure."


The completed construction will rise to 46 stories and a planned height of 186 m (610 ft).
 

Clearpoint will contain 164 apartments, each with 2300 square-feet (213.68 sq m) of floor space. The apartments are designed to give the residents a sense of ground-level living, as well as privacy and tranquility despite being located in a bustling city.


The planted terraces for each apartment will help to absorb sound, provide shade and cleanse the air by absorbing carbon dioxide. They will be automatically watered using a drip-irrigation system. The water used for the irrigation will be harvested rainwater, recycled bathroom sink and shower water. It will also be used for toilet flushing. These methods of ensuring water usage efficiency will help to reduce intake from the national water supply by an estimated 45 percent.
By increasing the size of the covered terraces and using plants for extra shade, it has been possible to ensure that none of the building's windows will be exposed to direct sunlight, which would have been one of the main causes of heat gain. This means that the size and energy requirements of the air conditioning units are reduced. All of the apartments are also cross-ventilated to provide further cooling.

Solar panels will be installed on the roof of the building and are expected to provide enough energy to power the shared facilities, such as lobby lighting, elevators, the water recycling system and an on-site sewage recycling/treatment system. Any excess electricity that is generated will be sold to the national grid.
"Ultimately, the aim is to create a living space where you can not only feel at one with the environment, but actively contribute towards safeguarding and sustainable use of its resources," says architect Milroy Perera. "The main focus of the apartment will be to provide an atmosphere and sentiment of ground level living."

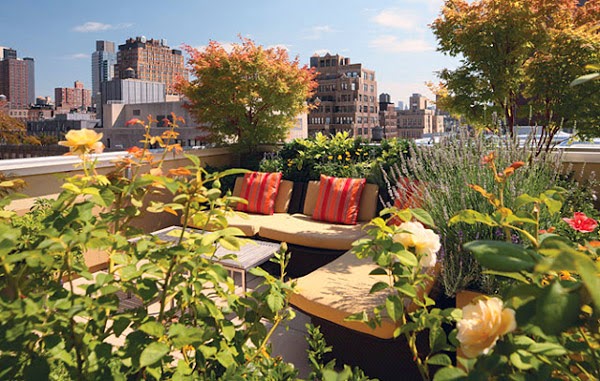
Roof Garden both practical and beautiful.

Green roof or living roof are practical and low costing solution, yet they are highly impact-full  and biologically friendly.

The biggest advantage of living roof is they are purify the atmosphere and reduce air pollution. Another advantage of living roofs is that they can be used for energy conversation. Rooftop plants provides natural insulation by reflecting light and heat. The insulation can cut down on energy uses and home utility costs, they also block outdoor noises.

Check out these roof gardens at Freshome


This Sealed Bottle Garden hasn't watered since 1972

80-Year-Old Man Hasn’t Watered This Sealed Bottle Garden Since 1972 And It’s Still Alive
In a beautiful example of a closed but functional ecosystem, David Latimer has grown a garden sealed inside of a giant glass bottle that he has only opened once since he started it almost 54 years ago.
Latimer planted the garden on Easter Sunday in 1960. He placed some compost and a quarter pint of water into a 10-gallon glass carboy and inserted a spiderwort sprout using wires. In 1972, he opened the garden again to add a bit of water. With that one exception, the garden has remained totally sealed – all it needs is plenty of sunlight.